用面板的起因很简单:我个人名下有 6 台 VPS 小鸡,每台都手动搭了 Xray 以此来给我和我的几个朋友用代理,但我们共用的同一个 UUID。搭建那会儿用的很方便但这实际上并不靠谱,因为流量没发监测,我也不能确定有没有外人使用我的代理。遂决定上面板统一管理。
选了 Remnawave,主要是它的 Panel + Node 分离架构比较干净(以及监控UI做的比较好看),支持每个用户独立 UUID 和订阅。
架构
处理架构是第一步,不然后续会很复杂。
Panel 作为中控面板单独跑在一台机器上,docker compose 部署,本身不跑 Xray,只负责管理配置和用户。Node 作为节点需要装在每台落地的 VPS 上,一个容器(remnanode),从面板拉配置、跑 Xray、上报流量。两者通过加密端口(默认 20000)通信。
配置层面:维护一份全局 Xray JSON,所有节点的 inbound 都写在里面,每个 inbound 有唯一 tag。每台 Node 在面板里只勾选属于自己的 tag,只跑自己那部分。
用户层面是三层关系:inbound(流量入口)→ Host(把 inbound 发布出去,生成订阅链接)→ Internal Squad(用户组,决定哪个用户能看到哪些 Host)。用户必须属于含目标 Host 的 Squad,否则订阅返回空.
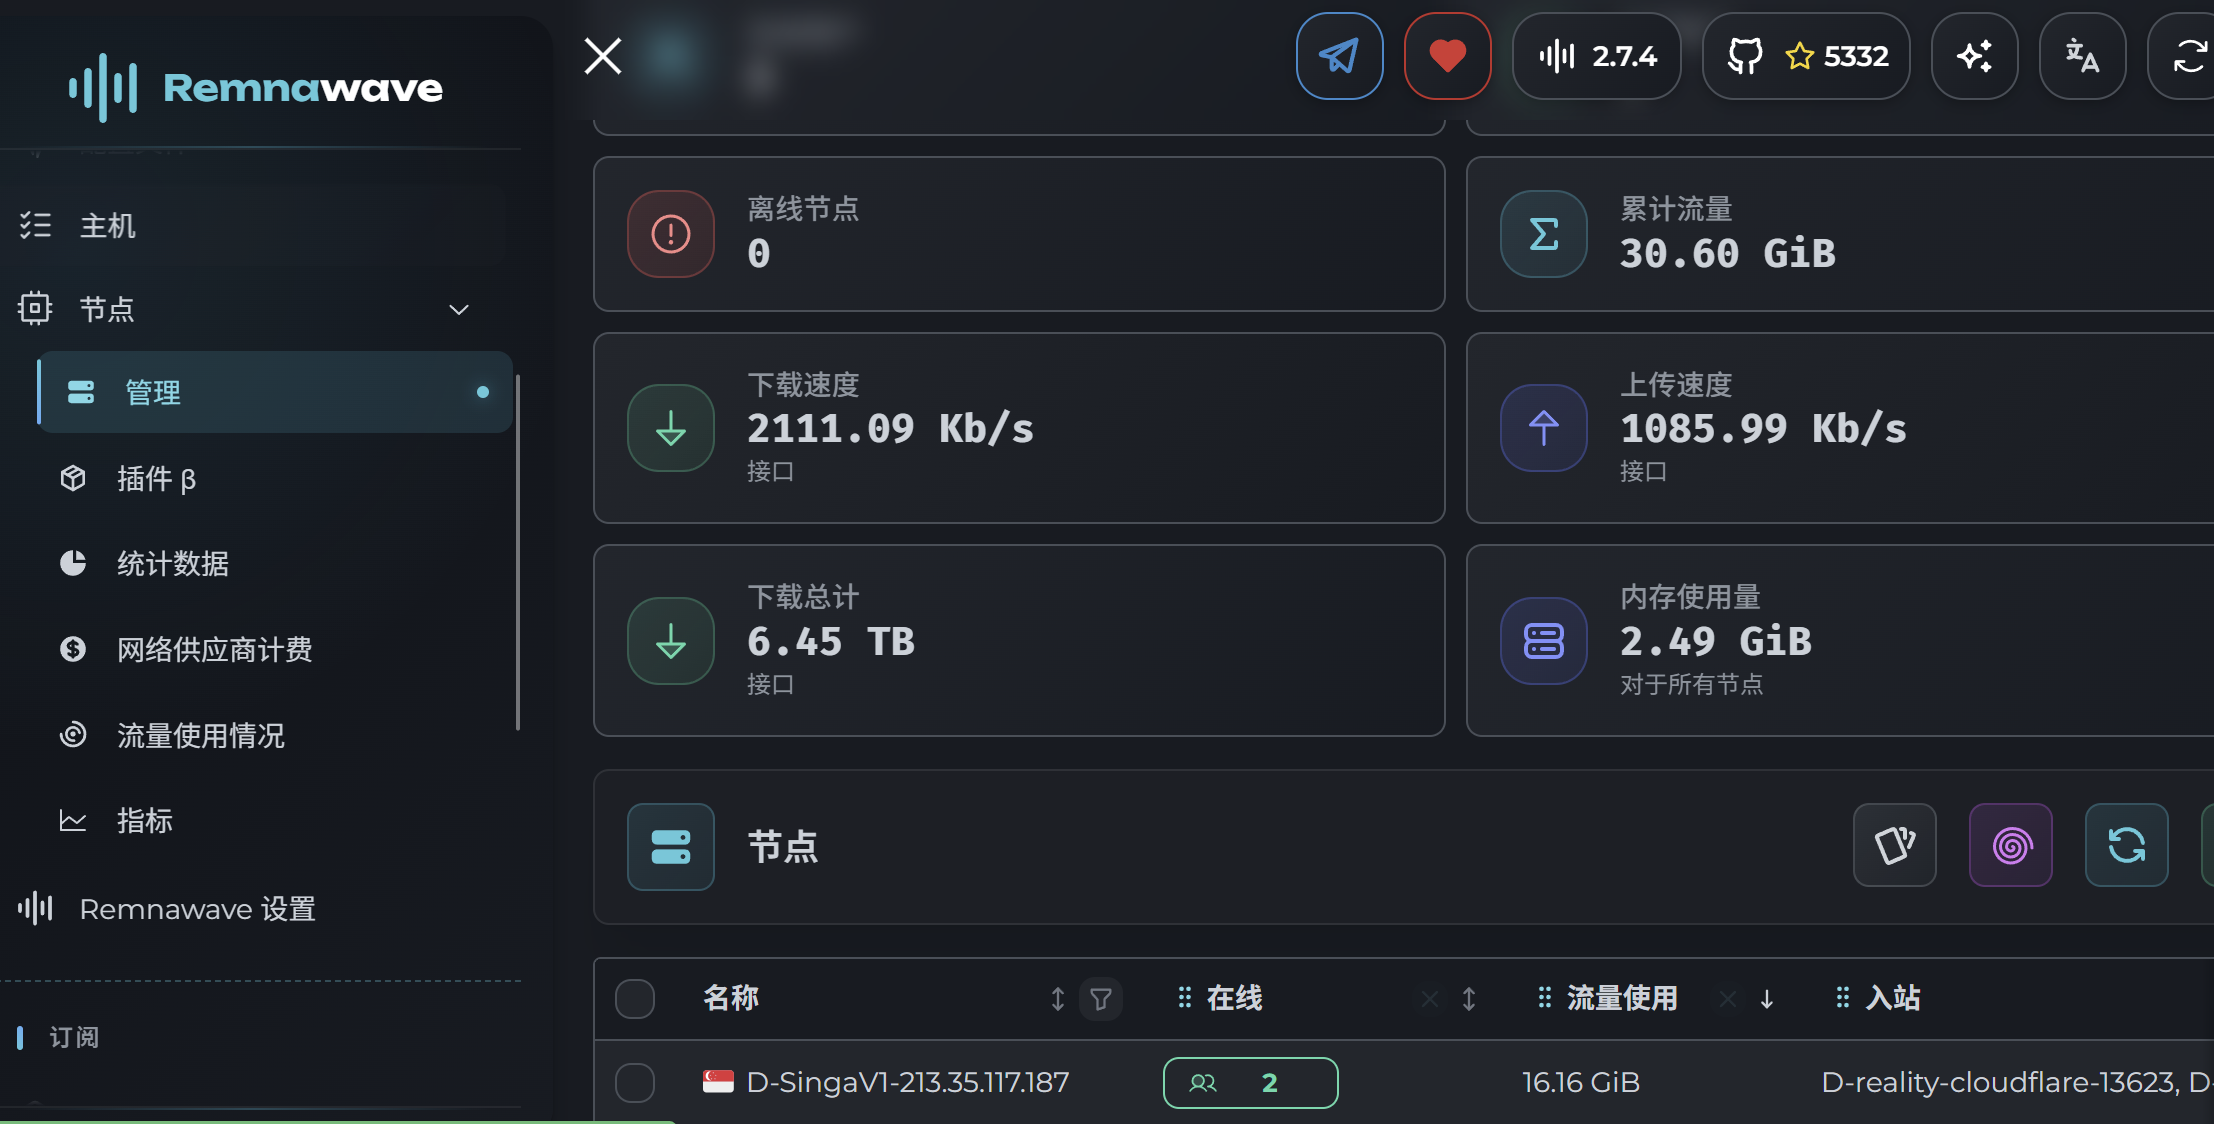
上图是接入完成后面板的状态,6 台节点全在线,累计流量、实时速率都在这里看。
两种密钥
这是搭建时候比较容易搞混的地方。
节点密钥(环境变量 SECRET_KEY):让 Node 和 Panel 互相认证、建立连接用的。面板创建节点时自动生成,填到 Node 的 docker-compose 里。
REALITY 私钥(X25519 密钥对):让客户端和节点做握手认证用的。用 docker exec -it remnanode xray x25519 生成,填在配置 JSON 的 privateKey 字段。可以多节点共用一个,公钥由面板自动算出来下发给客户端。
两个密钥完全独立,和 dest / SNI 也没关系。REALITY 的 dest 是借大厂证书做流量伪装,私钥是协议自己用来区分自己人与探测者的,是两件事。
遇到的问题
sing-box 不支持 VMess 入站。有台节点核心跑的是 sing-box,直接把原来的 VMess inbound 贴进去报错。直接删掉 2 个遗留 VMess 改成了 对应的VLESS
端口冲突。从旧节点迁移的机器,旧 Xray 还在宿主机上跑着占着端口,新容器起不来,报 bind: address already in use。ss -tlnp | grep <端口> 找到占用进程,systemctl stop 停掉,重启容器就好。
tag 没勾导致端口不监听。这个比较蠢, 配置里写了 inbound 不等于节点会跑,必须在面板里勾上对应 tag 才会下发。贴完配置 → 勾 tag → 重启 → ss 确认端口。 刚开始配置时候死活找不到问题
订阅返回空。订阅链接里全是占位提示(No hosts found / Check Hosts / Check Internal Squads),原因是 Host 没建,或者用户没放进含 Host 的 Squad 里。
Oracle 双层防火墙。Oracle VPS 有两层防火墙:云控制台的 Security List 和机器内的 iptables(Oracle 镜像默认开启,优先级高于 ufw)。症状是本机 curl 127.0.0.1:port 通,面板连不上(EHOSTUNREACH / timeout)。两层都要放行业务端口和 20000。
节点 IP 填错一位。面板里节点地址少打了一个数字,面板一直 timeout。后来摸出来一个规律:timeout 一般是连错地址或被静默丢弃;密钥错会报认证失败,不是 timeout。
Cloudflare 规则选错。想让面板域名不带端口访问,用了 Redirect Rule(301 跳转),结果不对。应该用 Origin Rule, 只改 CF 回源端口,对访客 URL 透明。只有面板域名开橙云代理,节点域名必须灰云直连,不然REALITY 和真 TLS 过不了 CF 代理。
TLS 证书自动续期
有 2 台绑了自有域名、走真 TLS 的节点,我觉得这里值得单独说。
证书要挂进容器,直接在 docker-compose 里用 volume 把证书目录挂进去,容器内路径对应配置里的 certificateFile / keyFile。不能用软链接, 容器看不到软链接目标。
acme.sh 默认续期只更新自己的工作目录,不会自动把新证书送到容器用的路径,结果就是节点拿着过期证书直到挂掉。解法是用 --install-cert 把搬运规则永久写进 acme.sh:
acme.sh --install-cert -d 你的域名 --ecc \
  --fullchain-file /节点证书目录/fullchain.pem \
  --key-file /节点证书目录/key.pem \
  --reloadcmd "sudo docker restart 容器名"
此后每次续期:自动把新证书复制到容器目录 → 执行 reloadcmd 重启容器。acme.sh 自带 cron 负责何时续,这条命令负责续完怎么处理。跑完看日志出现 Installing full chain + Running reload cmd + Reload successful 就算配好了。
另外 acme.sh 装在普通用户下,不要用 sudo 跑它,只有 reloadcmd 里的 docker restart 需要免密 sudo。
结果
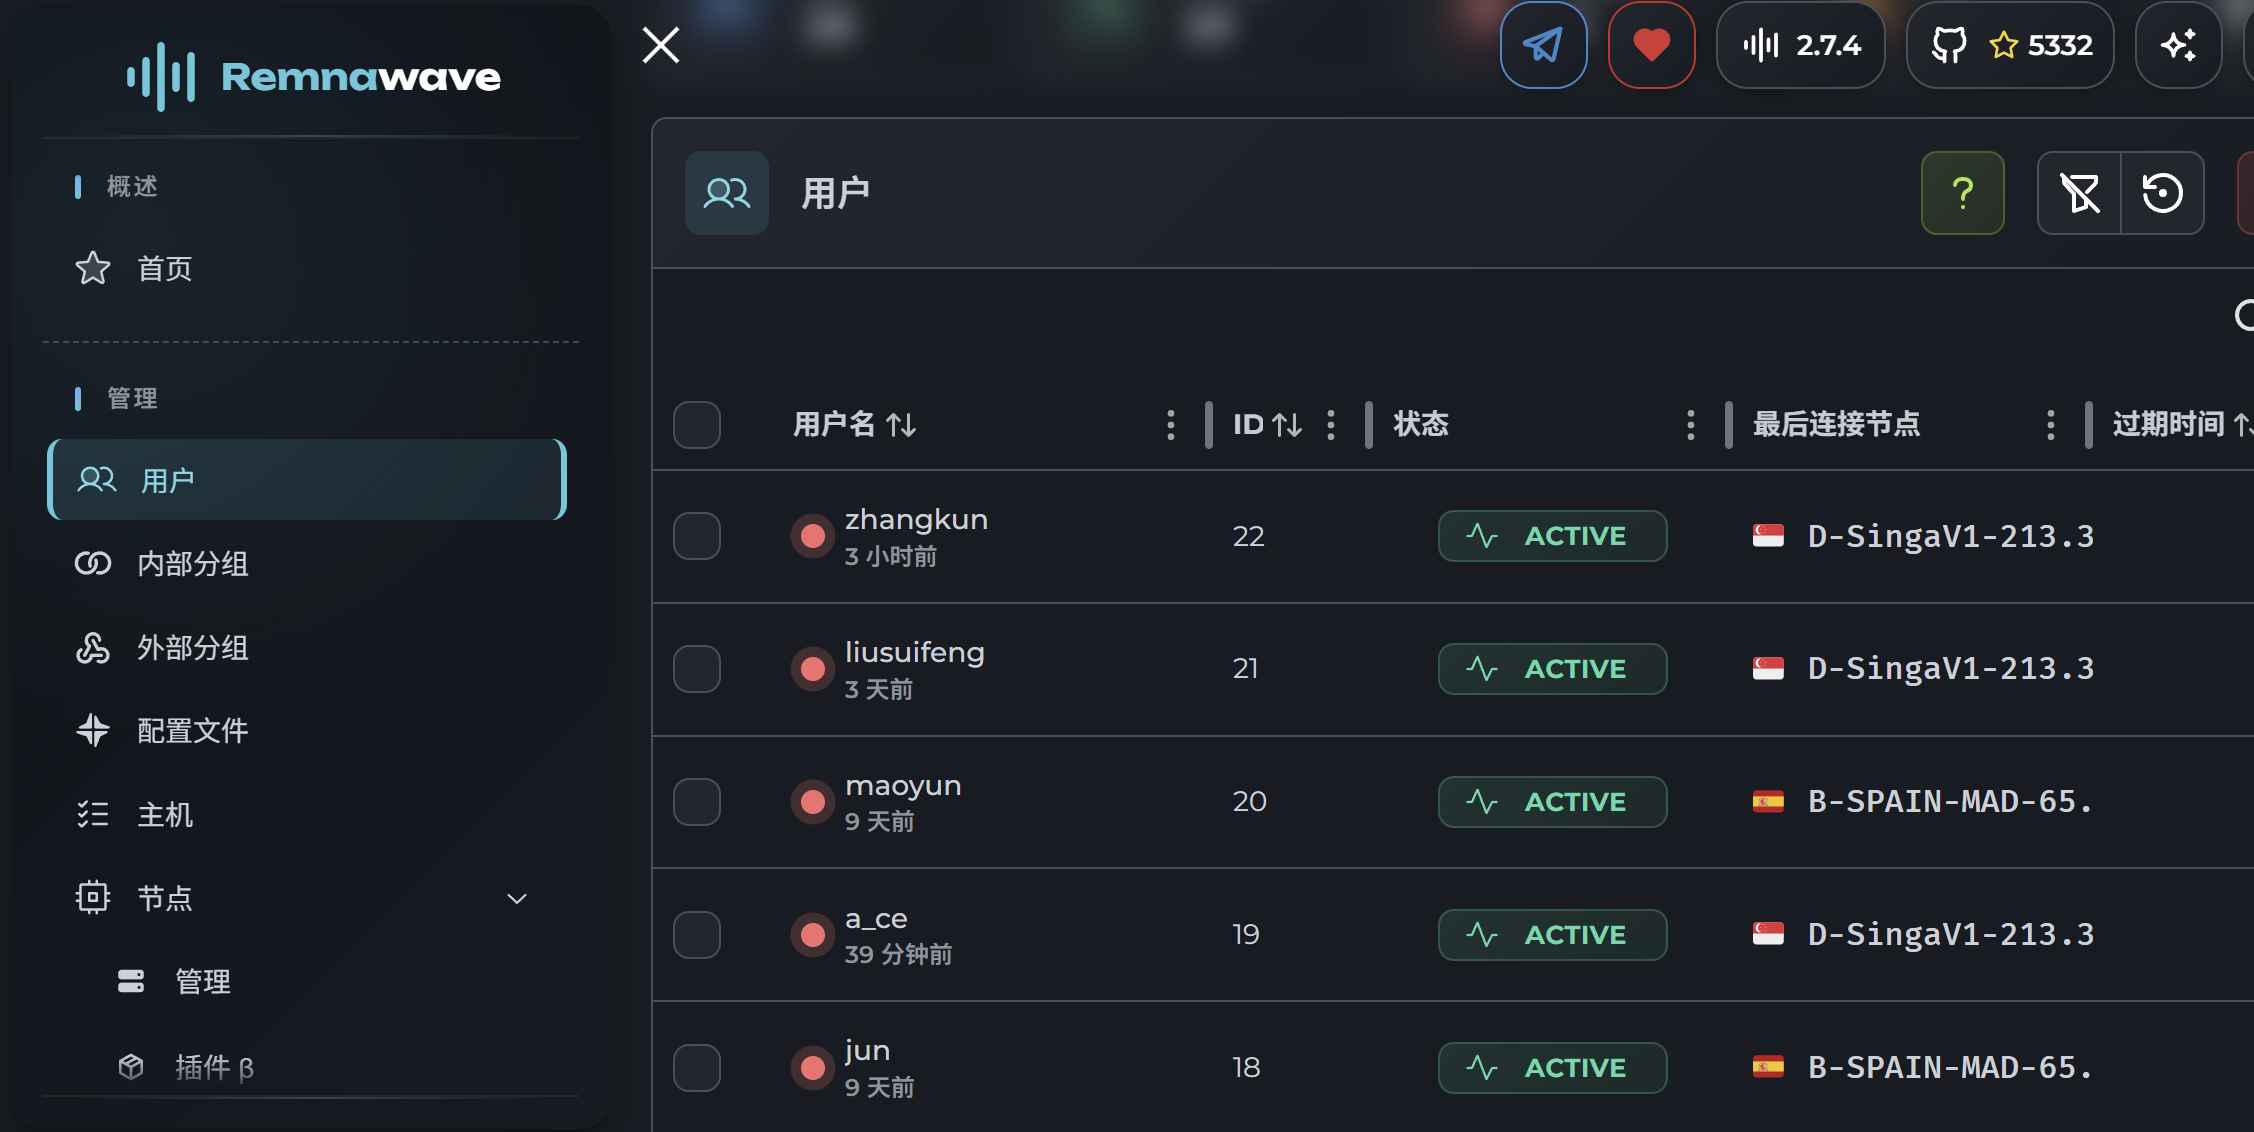
目前 6 台全接进来,每个朋友都拥有其独立 UUID + 独立订阅,流量各自统计,TLS 续期也不用管了。相比之前人手一个 UUID 的状态,好用很多。
The reason was simple enough. I personally own 6 budget VPS servers, each one running Xray manually as a proxy for me and a few friends, all sharing the same UUID. It worked fine at first, but it was not a great setup. I had no way to monitor traffic, and no way to know whether someone outside my group was using my proxy. So I decided to set up a panel to manage everything properly.
I went with Remnawave. The main reason is the clean Panel plus Node separation architecture (and the monitoring UI actually looks quite nice), plus it gives every user their own UUID and subscription link.
How It Works
Getting the architecture sorted out first saves a lot of headache later.
The Panel runs as the control center on one dedicated machine, deployed with docker compose. It does not run Xray itself. It just manages config and users. Each VPS runs a Node container (remnanode) that pulls config from the Panel, runs Xray, and reports traffic back. The two communicate over an encrypted port (default 20000).
On the config side: you maintain one global Xray JSON file. Every node’s inbound is written in this one file, each with a unique tag. In the Panel, each Node picks only the tags that belong to it, so it only runs its own part of the config.
On the user side, there are three layers: inbound (the traffic entry point), then Host (publishes an inbound and generates a subscription link), then Internal Squad (a user group that controls which Hosts a user can see). A user has to belong to a Squad that contains the right Host, otherwise their subscription comes back empty.
The screenshot above shows the Panel after everything was connected. All 6 nodes are online, total traffic and live speeds all in one place.
Two Keys
This is the part that is easiest to mix up during setup.
Node key (environment variable SECRET_KEY): Used for the Node and Panel to authenticate each other and establish a connection. The Panel generates this automatically when you create a node entry. You paste it into the Node’s docker-compose file.
REALITY private key (X25519 key pair): Used for the client and node to do a handshake. Generate it with docker exec -it remnanode xray x25519 and put it in the privateKey field of your config JSON. Multiple nodes can share one key pair. The Panel calculates the public key automatically and pushes it to clients.
These two keys are completely independent from each other, and neither has anything to do with dest or SNI. The REALITY dest is just a big site’s domain used to disguise your traffic. The private key is what lets the node tell apart real users from network scanners. Two completely separate things.
Problems I Hit
sing-box does not support VMess inbound. One of my nodes was running sing-box as its core. When I pasted in the old VMess inbound config it threw an error. I just deleted the 2 leftover VMess inbounds and switched them to VLESS. Problem gone.
Port conflict. On machines migrated from old nodes, the old Xray was still running on the host and holding the port. The new container would not start, giving bind: address already in use. Use ss -tlnp | grep <port> to find what is using it, systemctl stop to stop it, then restart the container.
Tag not checked, port not listening. This one was kind of dumb. Writing an inbound into the config does not mean the node will actually run it. You have to check the tag in the Panel for it to get pushed down to the node. Paste config, check tag, restart, then run ss to confirm the port is open. I spent way too long at the start not knowing what was wrong because I kept skipping this step.
Subscription returns empty. The subscription link just shows placeholder text (No hosts found / Check Hosts / Check Internal Squads). The cause is either the Host was not created, or the user was not added to a Squad that contains that Host.
Oracle’s two-layer firewall. Oracle VPS has two separate firewalls: the Security List in the cloud console, and iptables inside the machine (Oracle’s default image enables iptables and it has higher priority than ufw). The symptom: curl 127.0.0.1:port works locally but the Panel cannot connect (EHOSTUNREACH / timeout). You need to open the ports in both layers, including the business ports and port 20000.
Typed the node IP wrong by one digit. I missed one digit when entering the node address in the Panel and it kept timing out. I eventually figured out a useful pattern: timeout usually means the wrong address or packets being silently dropped; a wrong key gives an authentication error, not a timeout.
Wrong Cloudflare rule type. I wanted the Panel domain to be accessible without typing the port number in the URL. I used a Redirect Rule (301 redirect), which was wrong. The right tool is an Origin Rule, which only changes what port Cloudflare connects to on the backend, without touching the URL the visitor sees. Also, only the Panel domain should go through Cloudflare’s proxy (orange cloud). Node domains must be DNS-only (grey cloud), otherwise REALITY and real TLS will not work through CF’s proxy.
TLS Certificate Auto-Renewal
Two of my nodes use real TLS with custom domains. I think this part is worth calling out on its own.
The certificate needs to be mounted into the container. In docker-compose, use a volume to map the certificate folder into the container, then point certificateFile and keyFile in your config to the paths inside the container. Do not use symlinks. The container cannot see what a symlink is pointing to.
By default, acme.sh only updates its own working directory when it renews a cert. It does not automatically copy the new certificate to wherever the container is reading from. The result is the node keeps using the expired certificate until things break. The fix is to use --install-cert to permanently register what acme.sh should do after each renewal:
acme.sh --install-cert -d your-domain --ecc \
  --fullchain-file /path/to/node/certs/fullchain.pem \
  --key-file /path/to/node/certs/key.pem \
  --reloadcmd "sudo docker restart container-name"
After this, every renewal goes like this: acme.sh copies the new cert to the container’s folder, then runs the reloadcmd to restart the container. acme.sh’s built-in cron handles when to renew. This command handles what to do after. You know it is set up correctly when the log shows Installing full chain then Running reload cmd then Reload successful.
One more thing: acme.sh is installed under a regular user account. Do not run it with sudo. Only the docker restart inside reloadcmd needs passwordless sudo.
Result
All 6 servers are now connected to one panel. Each friend has their own UUID and subscription link, traffic is tracked per person, and TLS renewal takes care of itself. A big step up from everyone sharing the same UUID.